

Soft Sourdough Sandwich Bread

This soft sourdough sandwich bread is fluffy, sliceable, and perfect for everyday baking. From school lunches to thick slices of buttered toast, this homestead favorite is easy to make and always kid-approved.
From the Cottage Kitchen Table
There’s a rhythm to this bread. It’s not loud or showy, the kind of loaf that steals the spotlight on Instagram with a dramatic ear and crust that shatters like glass. No, this bread is quieter. It’s the loaf that sits on the kitchen counter, still warm from the oven, while kids wander in asking, “Is it ready yet?” It’s the bread that holds peanut butter sandwiches in lunchboxes, cradles BLTs made with tomatoes from the garden, and sits buttered next to a steaming mug of coffee on a Monday morning.
This soft sourdough sandwich bread has become the backbone of our days here at the cottage. It’s not just bread; it’s routine, comfort, and a little piece of steadiness when life feels busy. I’ve lost count of how many loaves I’ve baked, but each one seems to carry its own memory — the time my toddler sat on the counter swinging his legs while sneaking crumbs, or when my teenager admitted that the smell of this bread baking is worth waking up for (high praise if you’ve ever lived with a teenager).
I love how this recipe meets you where you are. Whether you’re just beginning your sourdough journey or you’ve been baking for years, this loaf is forgiving, approachable, and steady. It doesn’t demand perfection. It asks for a little time, a little care, and in return it gives you the kind of bread that makes ordinary moments feel special.
So pull up a chair, pour yourself a cup of coffee, and let’s bake together.
What You’ll Love About This Recipe
Soft & Fluffy – Perfect for sandwiches, toast, and little hands reaching for snacks.
Kid-Approved – My boys devour this one without hesitation.
Everyday Loaf – Easy enough for weekly baking, but special enough to feel homemade.
Forgiving Process – No complicated techniques, just simple steps and time.
Baker’s Notes Before We Begin
This bread is made with a fed and active sourdough starter. Make sure yours is bubbly and ready to rise.
The secret to its tenderness is kneading in butter after mixing — don’t skip it!
If your kitchen runs cool, use my favorite trick: place the dough in a turned-off oven with just the light on for a warm, steady rise.
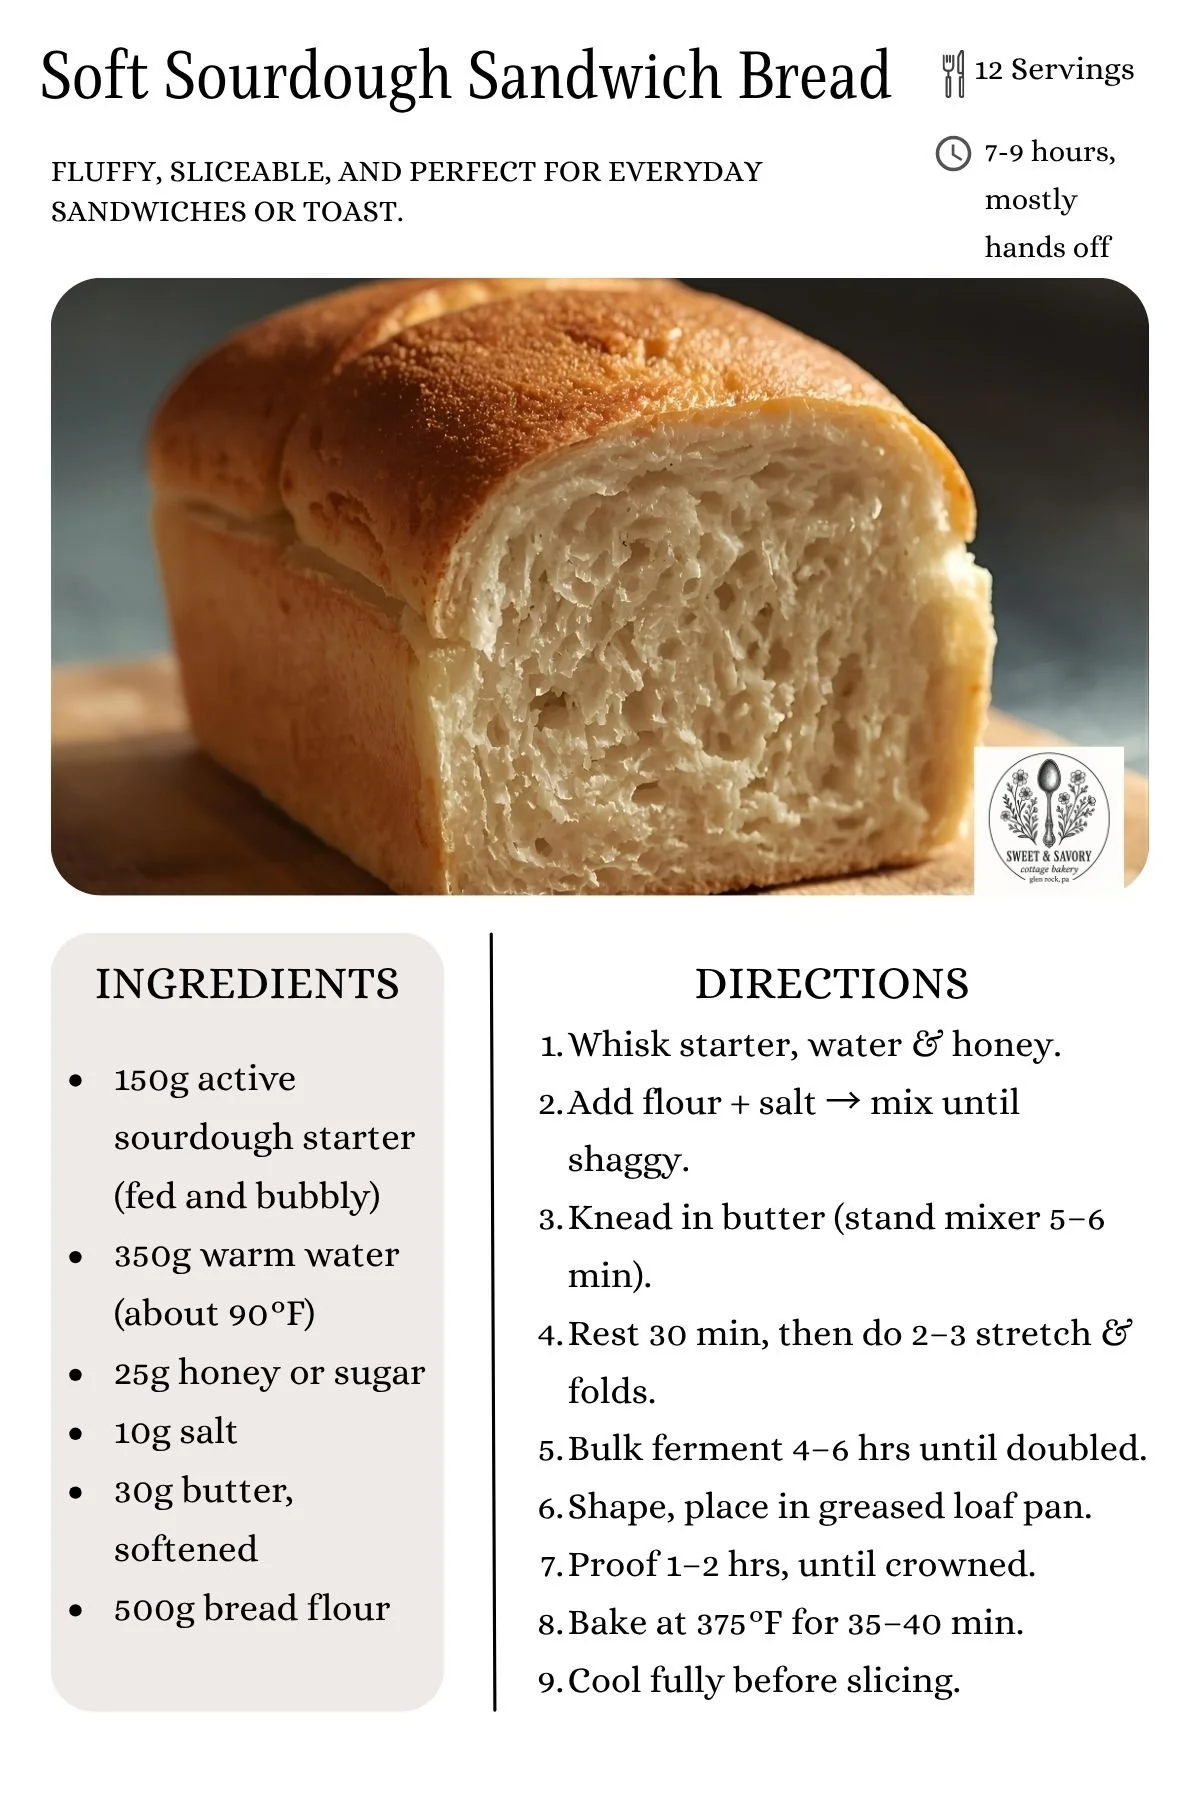
Step-by-Step: Soft Sourdough Sandwich Bread
1. Mix the starter, water, and honey
In a large bowl, whisk together your bubbly, active sourdough starter with warm water and honey (or sugar). The warmth helps the starter wake up and the honey adds just a touch of sweetness that balances the bread.
2. Add the flour and salt
Stir in the flour and salt until you get a shaggy, sticky dough. Don’t panic if it looks rough — this is exactly what you want at this stage. It doesn’t need to be smooth yet.
3. Knead in the butter
Now for the secret to that pillowy texture: butter. Knead the softened butter into the dough until fully absorbed. A stand mixer with a dough hook works wonders here (5–6 minutes). If kneading by hand, rub the butter into the dough until it disappears.
4. Rest the dough
Cover the bowl and let the dough rest for 30 minutes. This short break allows the flour to hydrate and makes the dough easier to handle.
5. Stretch and fold
Every 30 minutes, for 2–3 rounds, gently stretch one side of the dough up and fold it over itself. Rotate the bowl and repeat. This builds strength without heavy kneading — like coaxing the dough into life.
6. Bulk fermentation
Cover the bowl and let the dough rise at room temperature until doubled in size (about 4–6 hours, depending on your kitchen temp). It should look airy, with visible bubbles, and feel jiggly when you move the bowl.
7. Shape the loaf
Gently turn the dough out onto a lightly floured surface. Press it into a rectangle, then roll it tightly into a log. Place it seam-side down into a greased loaf pan.
8. Final proof
Cover and let the dough rise again for 1–2 hours, until it just crowns over the rim of the loaf pan. This is your cue that it’s ready for the oven. (Tip: If your kitchen is chilly, proof it in the oven with just the light on.)
9. Bake
Preheat your oven to 375°F. Bake the loaf for 35–40 minutes, until golden brown. The top should sound hollow when tapped, and the internal temperature should reach about 195–200°F.
10. Cool and slice
The hardest step — let the bread cool completely before slicing. This sets the crumb and keeps it from turning gummy. I know it’s tempting, but it’s worth the wait.
Here’s the recipe card for you to follow, save, or print (scroll back up for the full story anytime you need a little cozy encouragement):
Tips for Success
Slice Clean: Let it cool completely before slicing (I know, it’s hard). Cutting too soon can make the inside gummy.
Storage: Wrap tightly and keep at room temp for 2–3 days, or slice and freeze for easy toast later.
Variations: Add oats on top, swap in a bit of whole wheat flour, or knead in seeds for texture.
From My Kitchen to Yours
Bread has a way of bringing people together, even in the simplest of ways. If you bake this loaf, I’d love to see it — snap a photo and tag me @sweetandsavoryhomestead so I can cheer you on.
Bake it with love, slice it with joy, and share it with someone you love. – Dawn, Sweet & Savory Cottage